
Alexa is the virtual assistant bundled with Amazon's Echo range of devices. Like Google Assistant and Apple's Siri, Alexa offers a Voice User Interface (VUI) to Amazon's services as well as a huge number of 3rd party services through Skills.
I've written a small skill before - my Magic the Gathering card finder MTG Wizard - and I learnt a whole heap of stuff along the way. However this was written in javascript which is not my strongest skill. Now I've found that you can write an Alexa Skill using .NET - much better!
Today I want to show you how to create a simple Alexa Skill with a .NET function hosted on Azure. We will do this by creating a simple skill to allow a user to create a pizza order and send it to our imaginary pizzeria, Pizzavendolo! 🍕
Create a new Skill
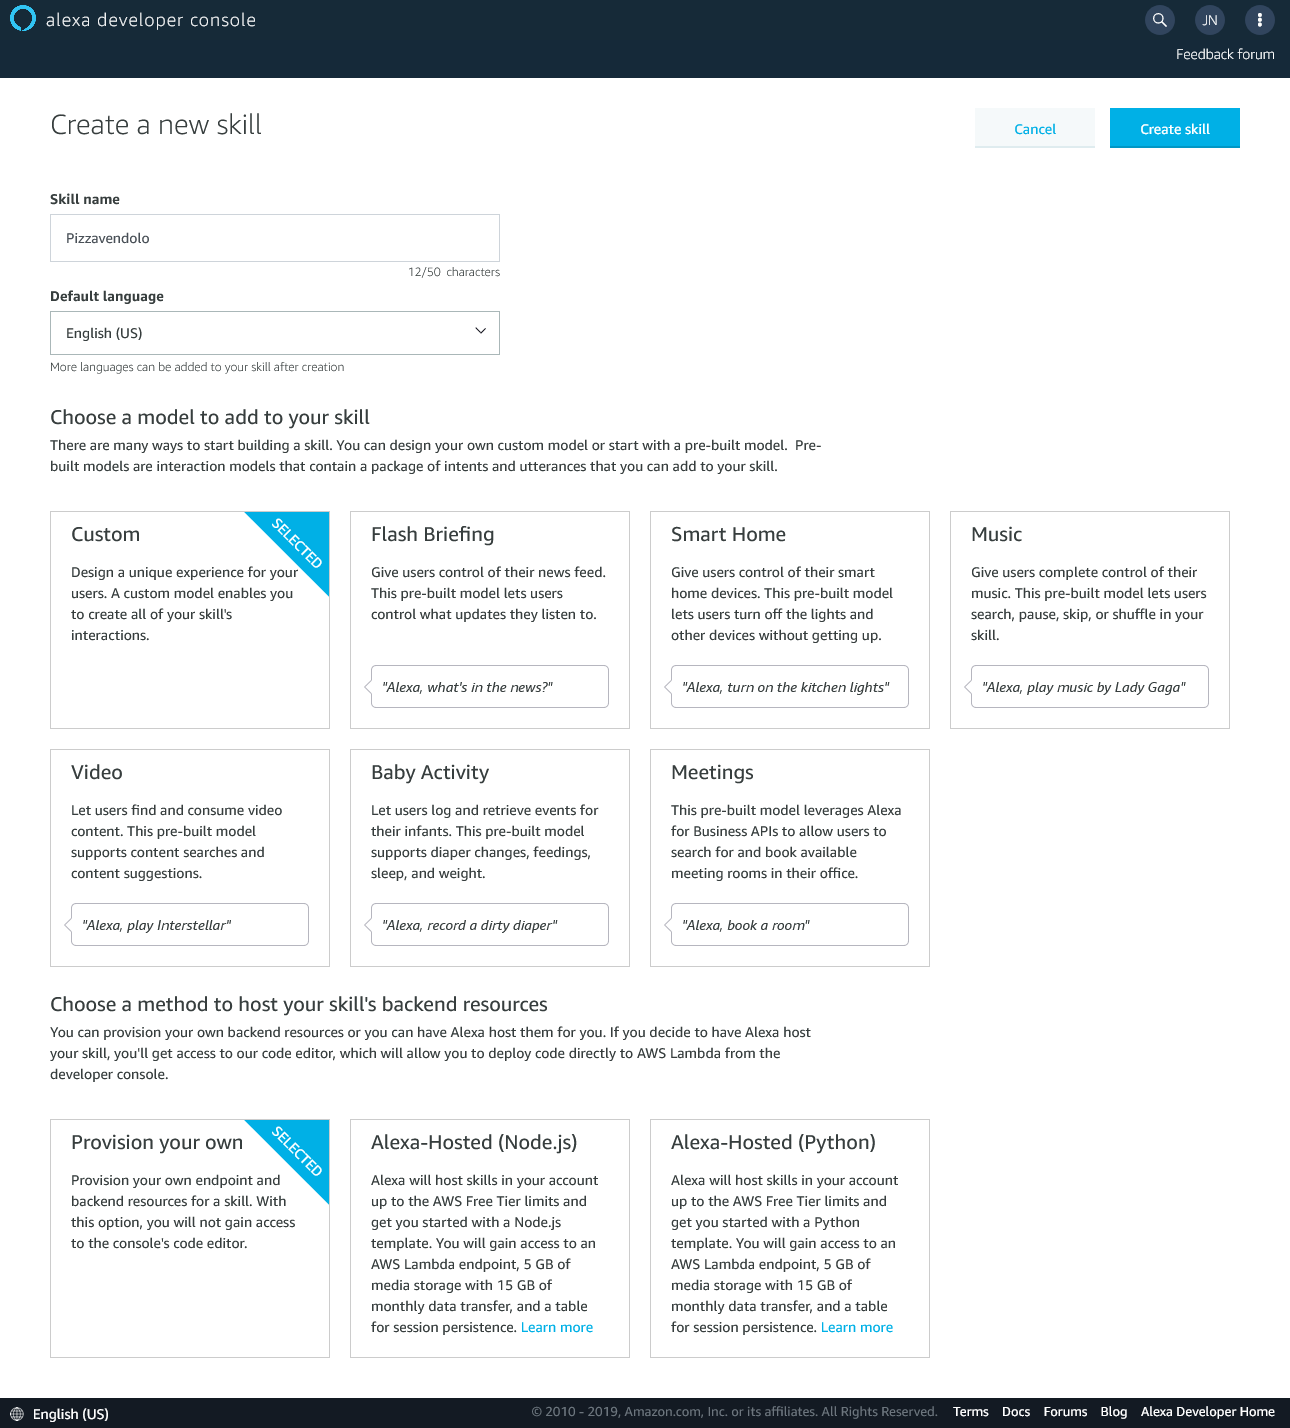
First step is to head on over to the Alexa Developer Console and (assuming you have signed up) hit "Create Skill". Here you need to pick a name for your skill - in our case Pizzavendolo!.
We are building a simple Model so we use the "Custom" model type and we are going to be hosting our backend on Azure, so pick "Provision your own" in the backend resources section.
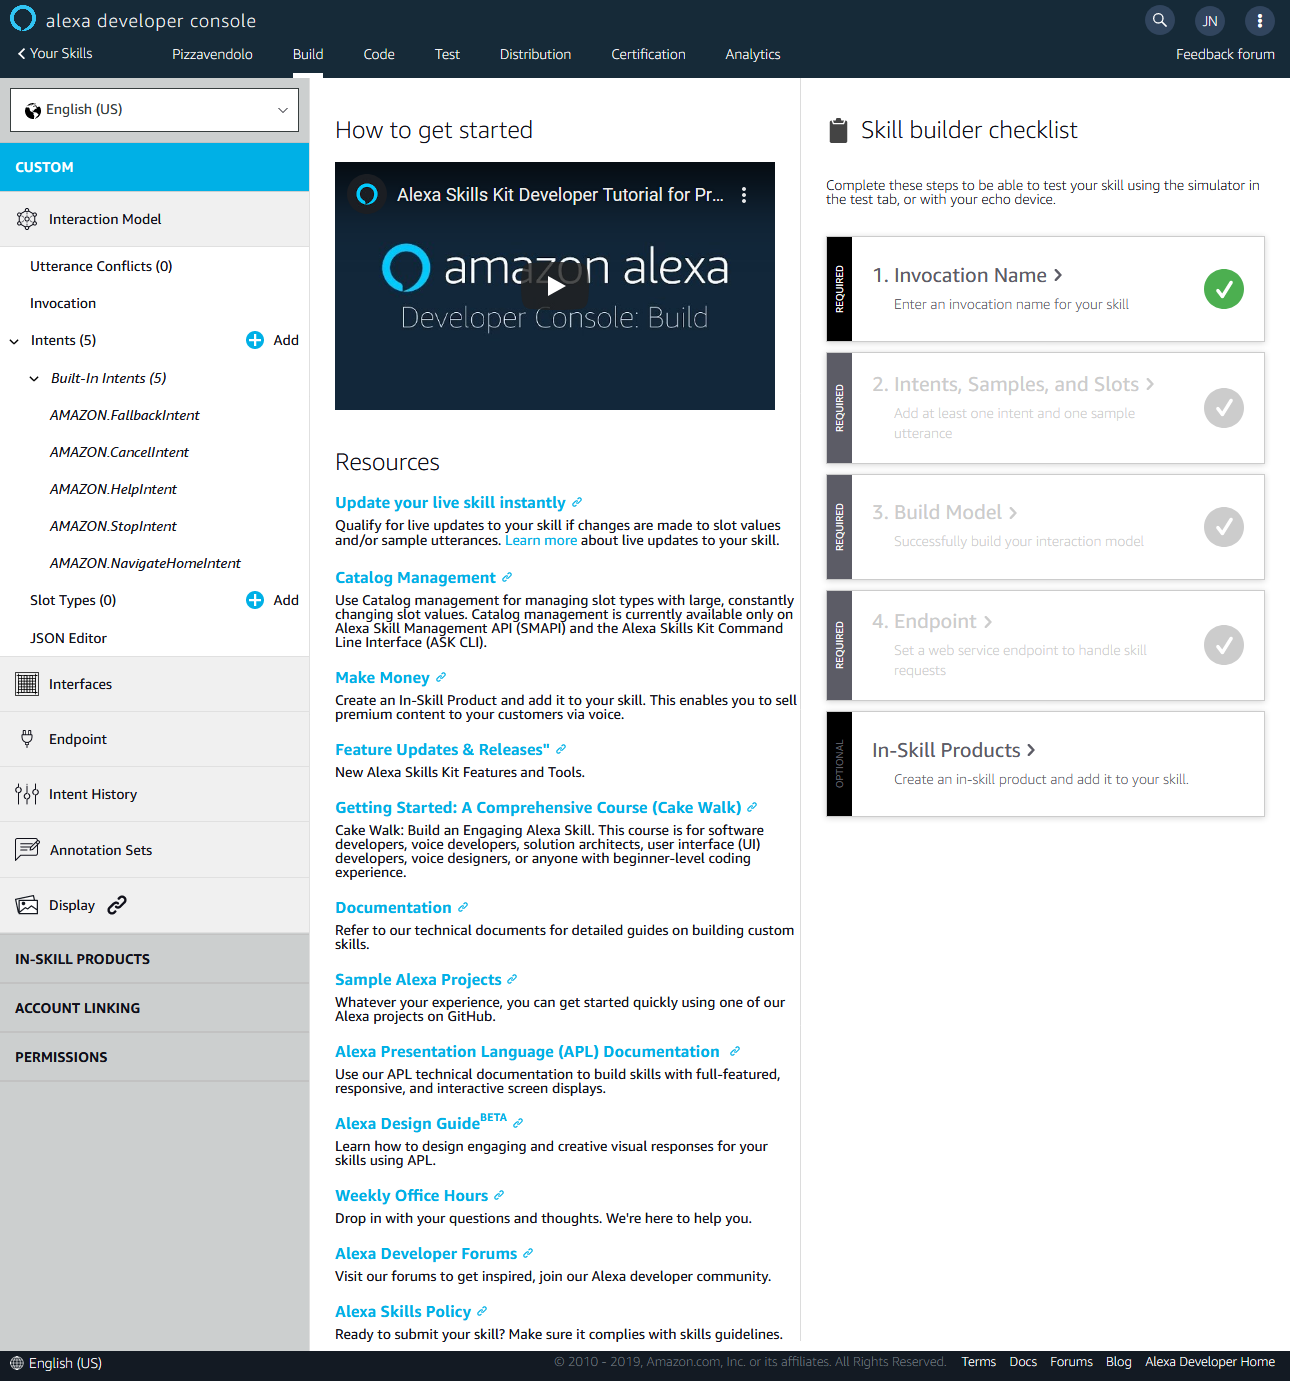
Now we have our project set up and we can configure everything we need. Along the top of the screen there are several options. Right now we are interested in the "Build" tab.
Setting up the Interaction Model
The interaction model defines all of the rules that will parse what a user has said to their Alexa device and where and what is passed to our function.
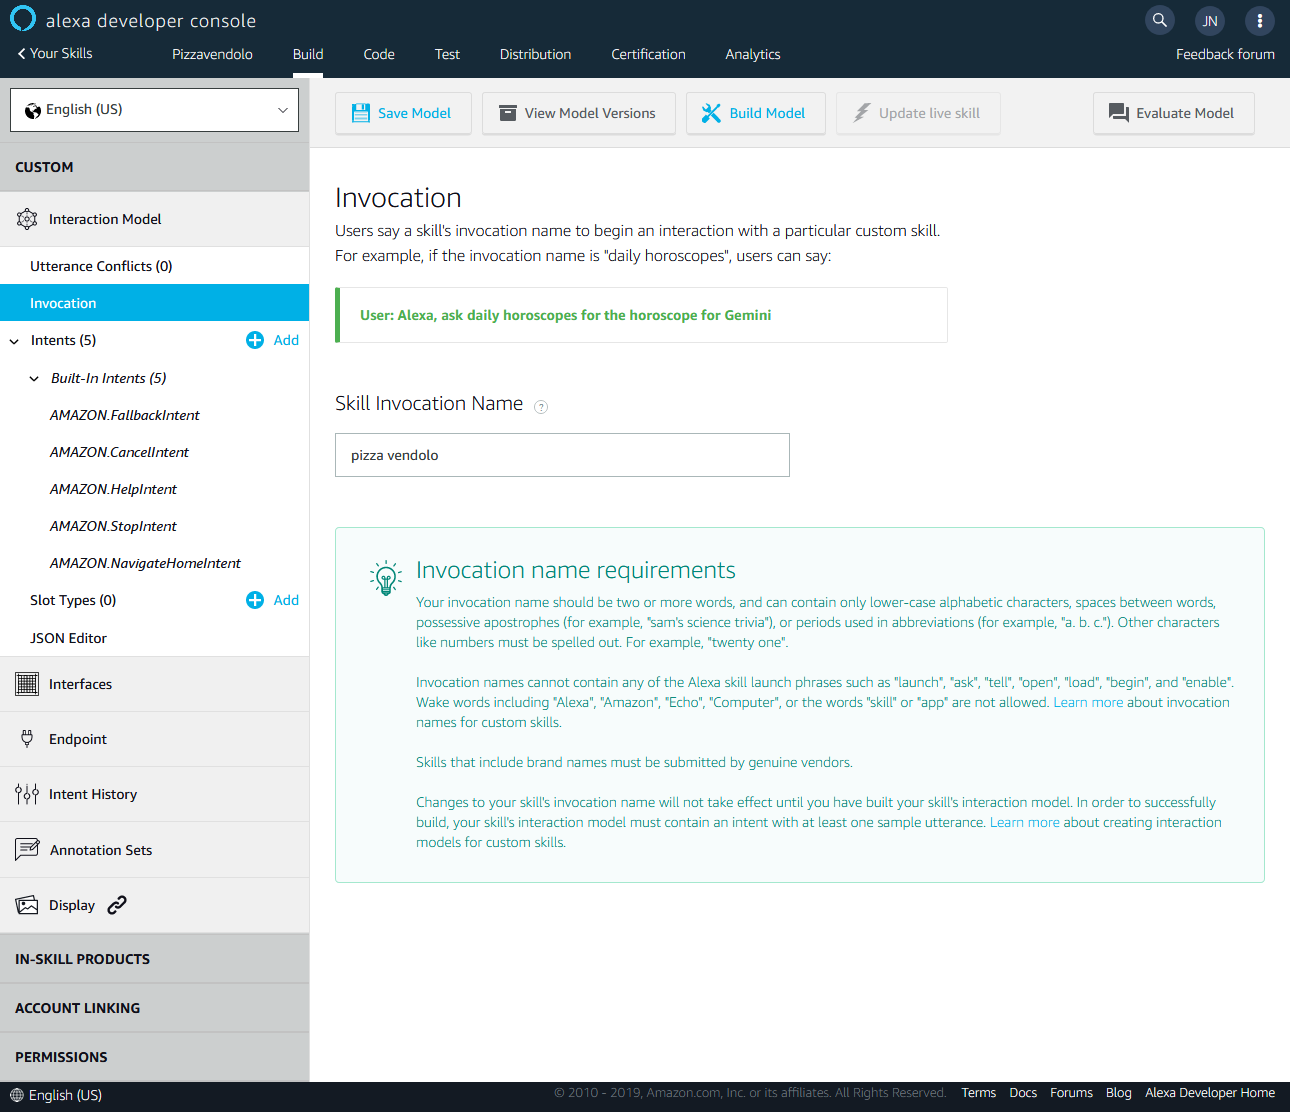
Invocation
Firstly we are going to set up the it's Invocation name - this what a user would say to start our application. Our invocation, "pizza vendelo", means that a user can say "Alexa, ask Pizza Vendele to order a large pizza" and our app will start to process the request. Yum 😋!
Intents and Slots
A skill is then made up of a series of Intents, which is what the user wants to achieve in that moment. The intent is determined from the user's utterances - what they have said. You will see a number of built-in intents that handle general actions the user might want to take in your skill, such as exiting or asking for help.
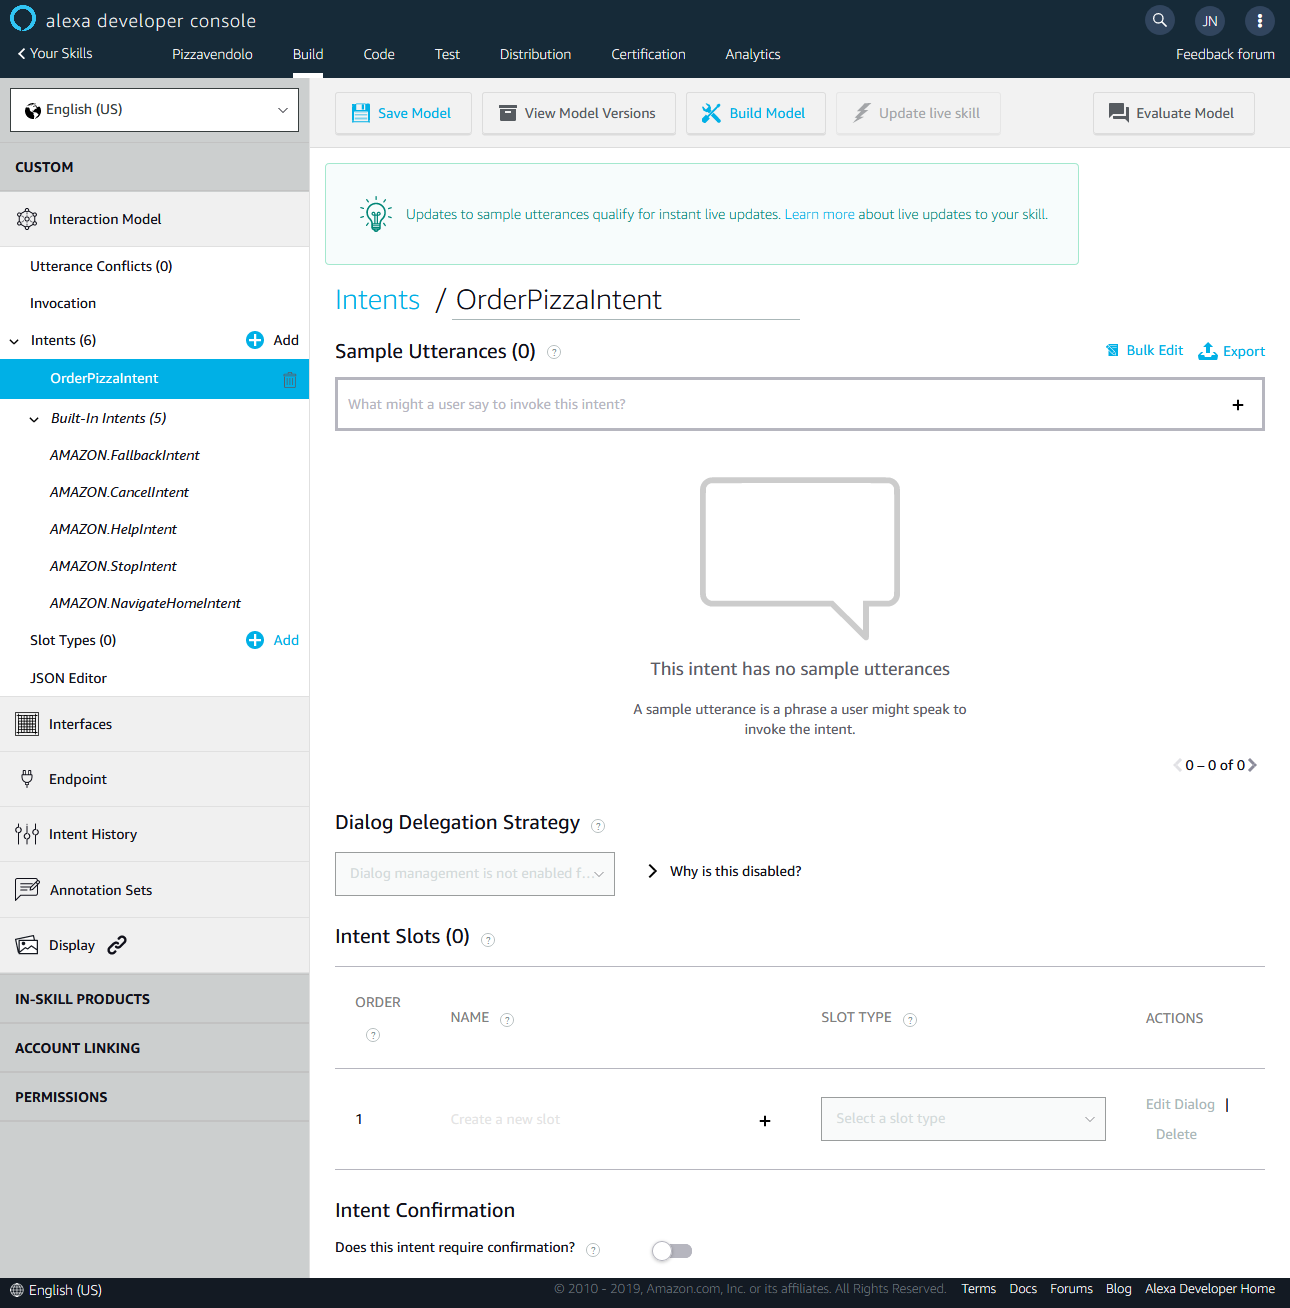
We are going to create a new intent called OrderPizzaIntent that will allow the user to say something like "order a large pizza".
Click "Add" next to the "Intents" heading, then choose "Create custom intent" and enter the name - OrderPizzaIntent. We can now see the configuration screen.
Each intent is made up of a number of utterances. These are example phrases that the user might say that will be handled by this intent.
Each utterance consists of a carrier phrase and a number of slots. We want the user to be able to choose and amount, the toppings and what size of pizza to order.
The user might say something like "Order 2 medium margherita pizzas". Here "Order ... pizzas" is the carrier phrase and there are three slots - the quantity, the size and the toppings.
We are going to create some slots which will define what we expect using a value from a list. To define the list, we to create a new slot type by clicking on "Add" next to "Slot Types" on the left. Choose "Create custom slot type" and call it "Toppings". We capture each different option we expect the user to say and also synonyms for each option.
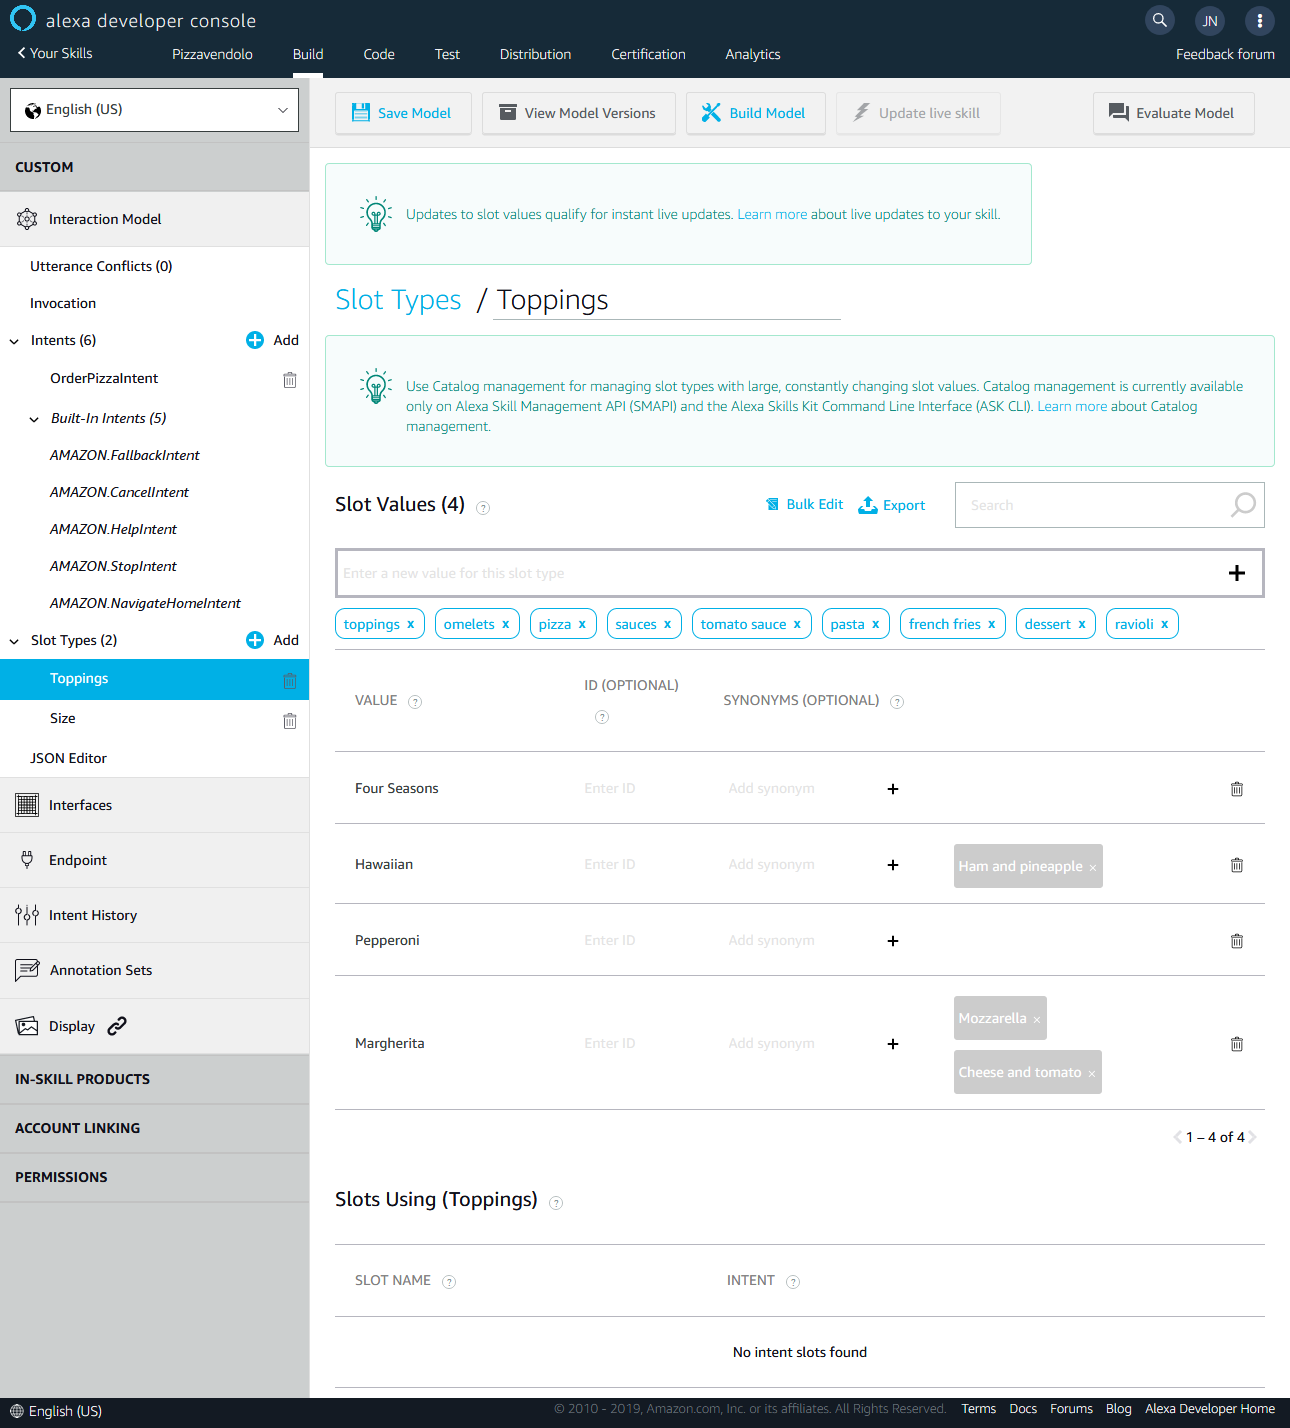
Next add another slot type called "Size" with the option for "Small", "Medium" and "Large".
We can play around with the slot synonyms and utterances once the skill is working to fine tune the capturing of the users intent
Next go back to our OrderPizzaIntent and create a new intent slot called "toppings" and choose our "Toppings" slot type.
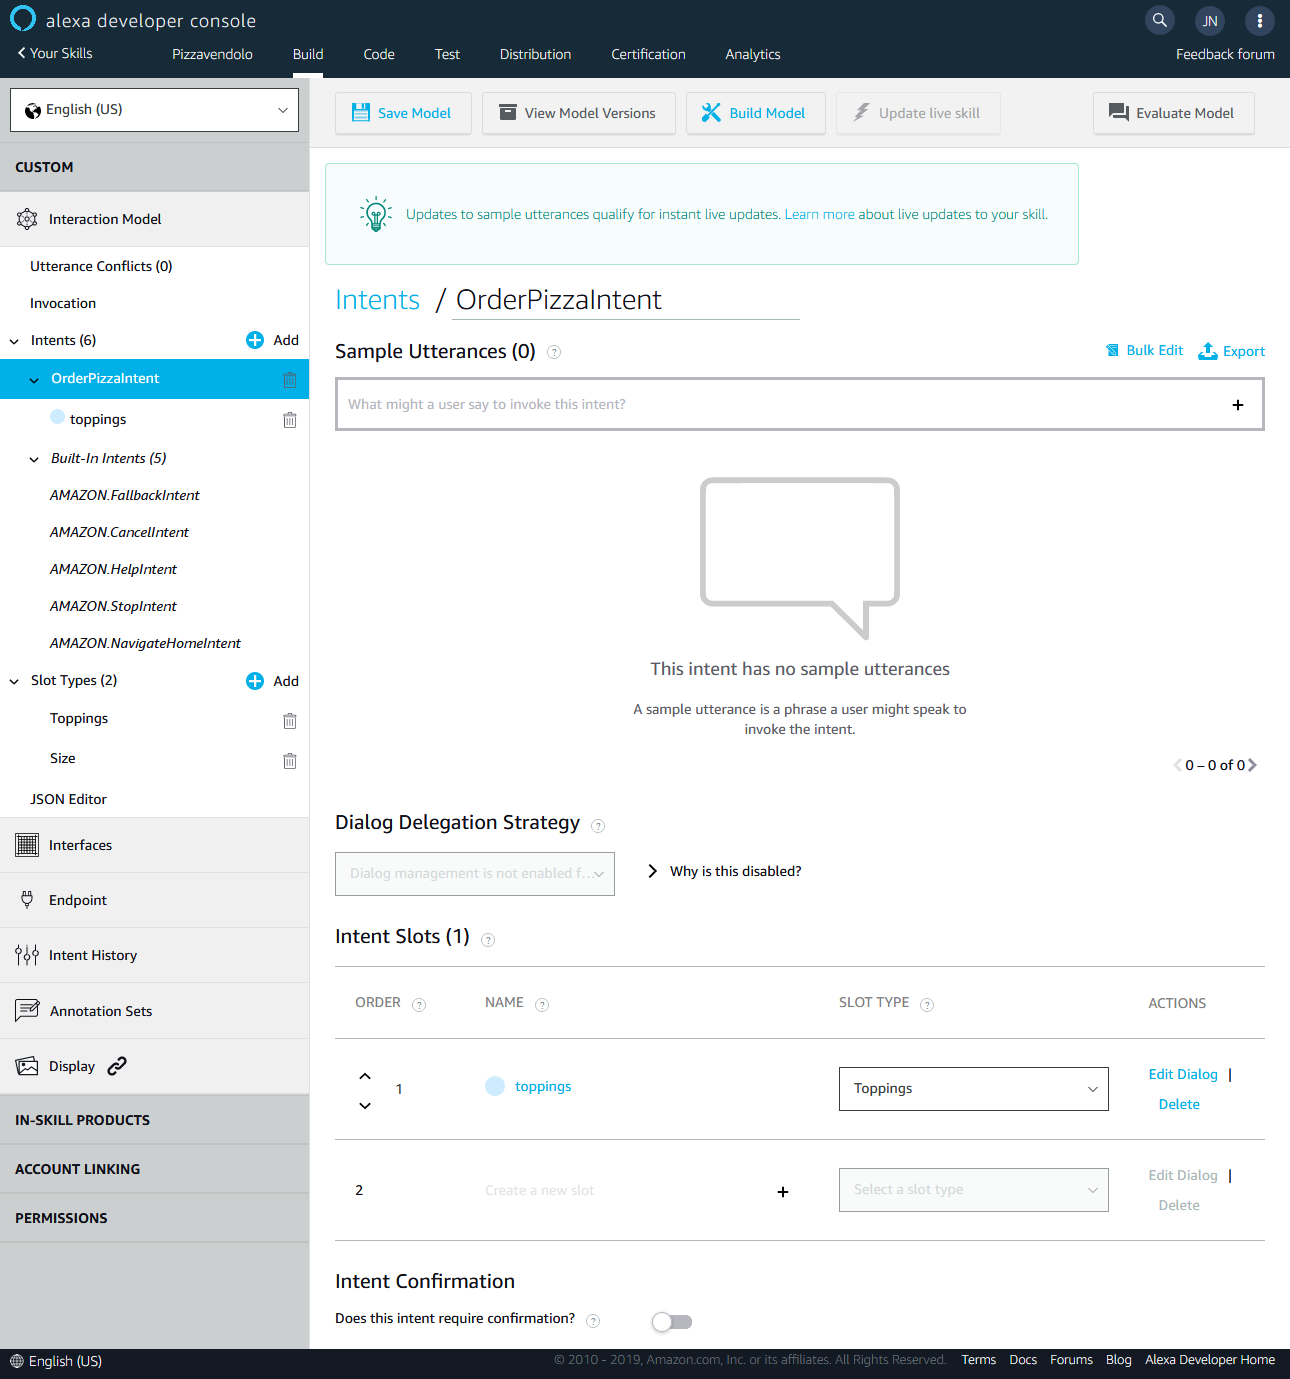
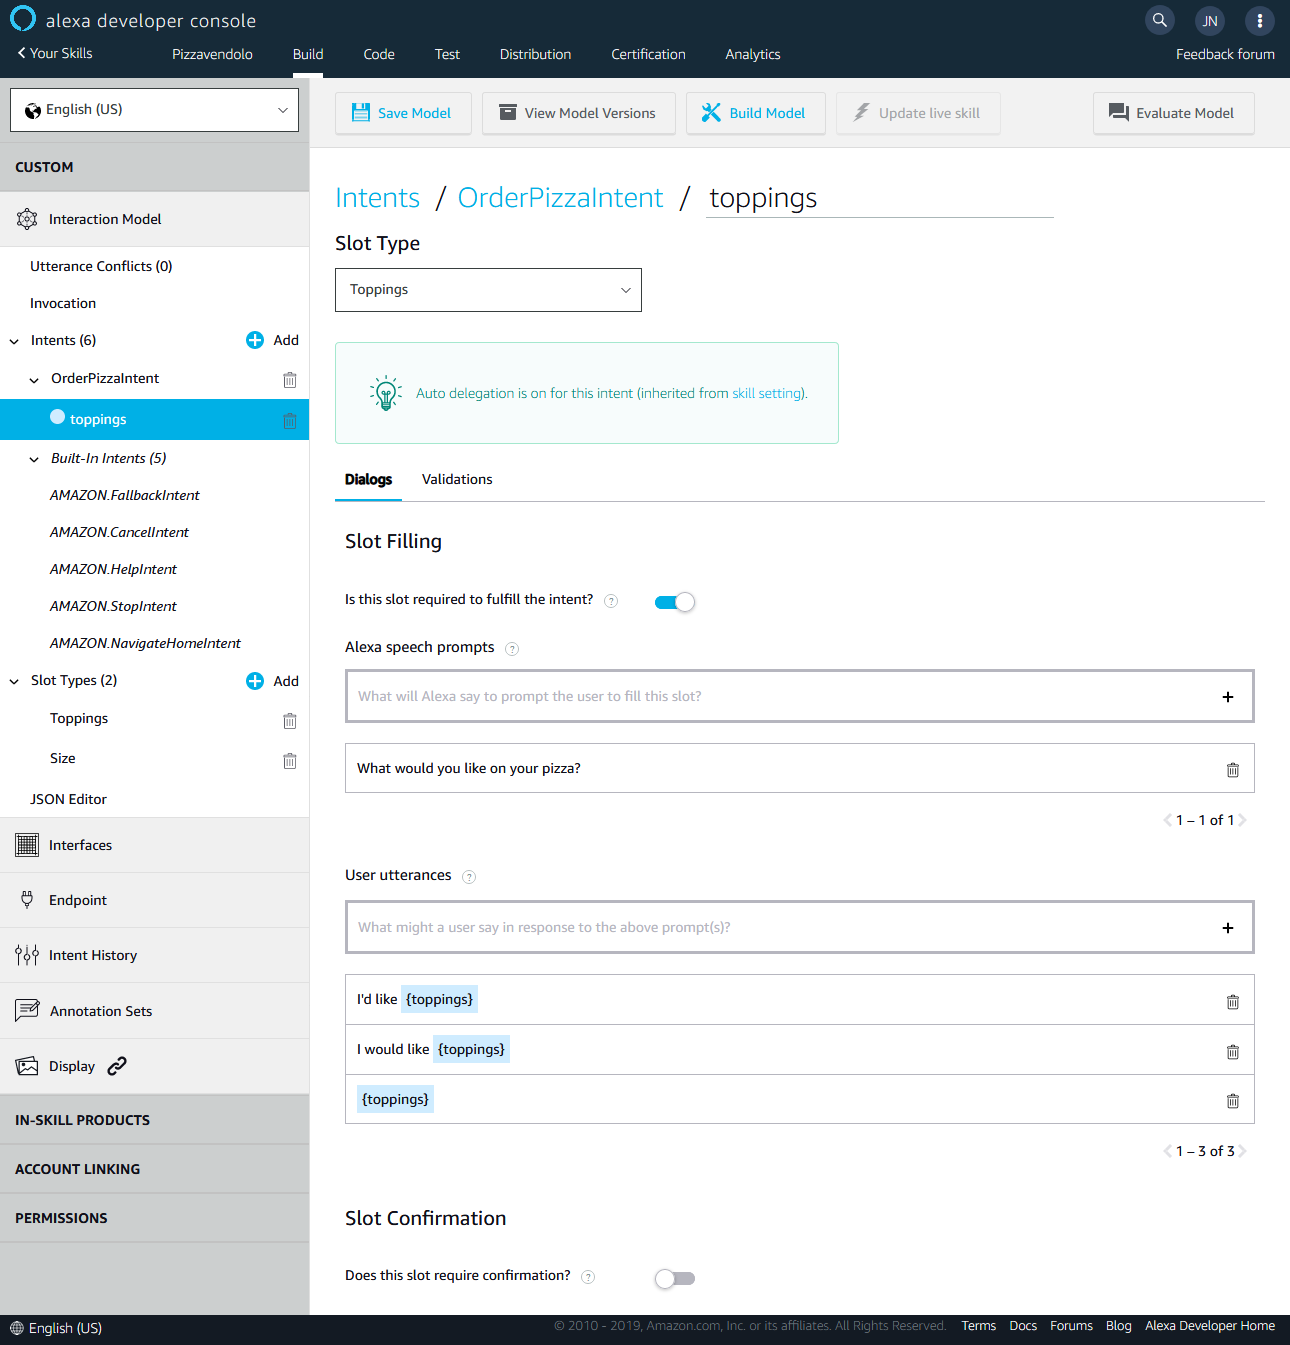
We want to ensure that the user provides a value for the topping they would like. If they do not, we will aske them. Click on "Edit Dialog" next to the slot.
Form this page we want to enable "slot filling" and enter a prompt that Alexa will say if a topping is not mention - What would you like on your pizza? - and we enter the utterances we would expect the user to say in response to the prompt. We'll cover utterances a little more shortly, but here we will expect them to just say a topping.
Now go back to the intent page and create another slot for "Size" and "Quantity". We can use one of the built-in slot types for the quantity - AMAZON.NUMBER - which will detect a number in the user's request.
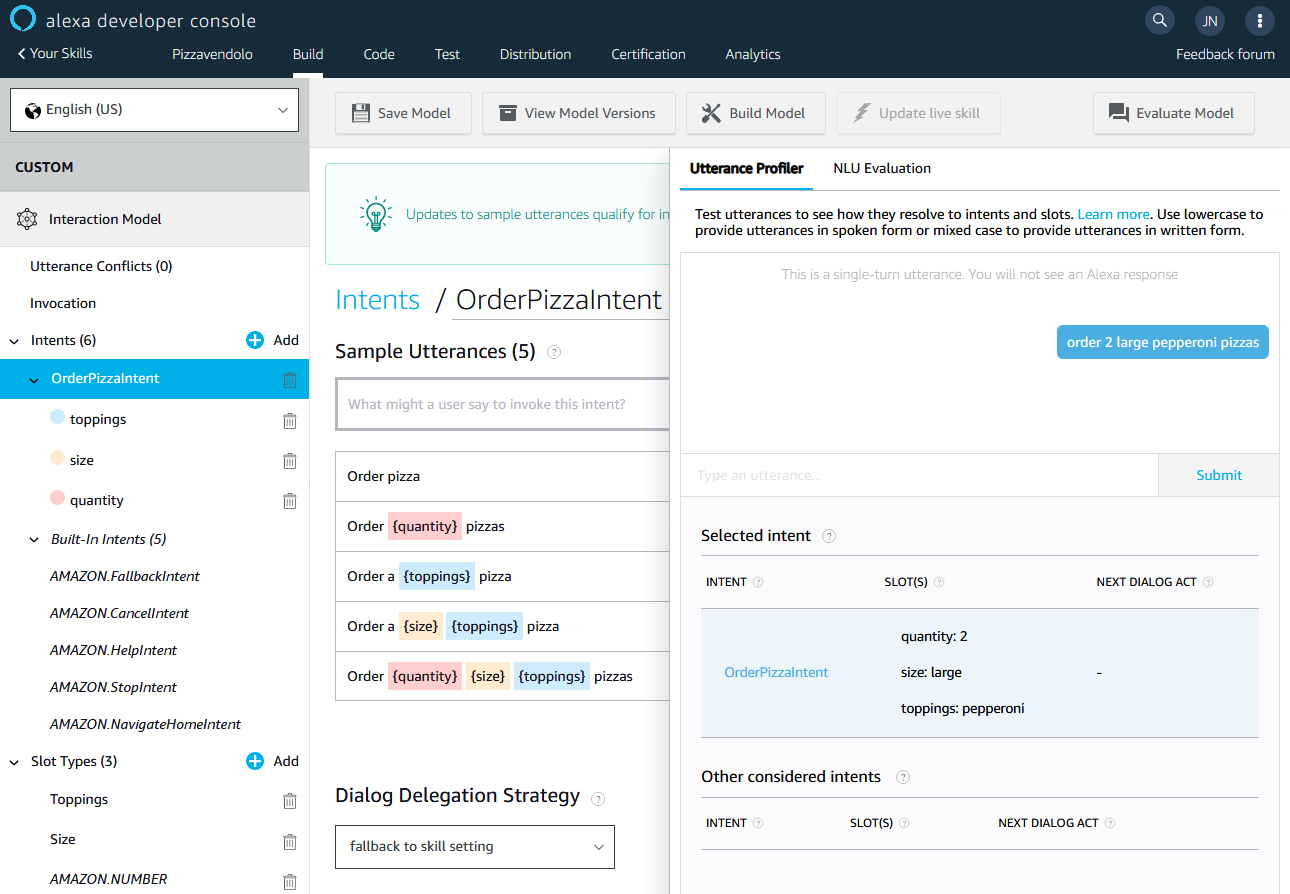
Next start filling in the sample utterances. The slots can be inserting into the utterance inside curly braces - so an example might be "Order pizza". Make sure you enter a range of variations to ensure it is picked up. This is where some experimentation comes in!
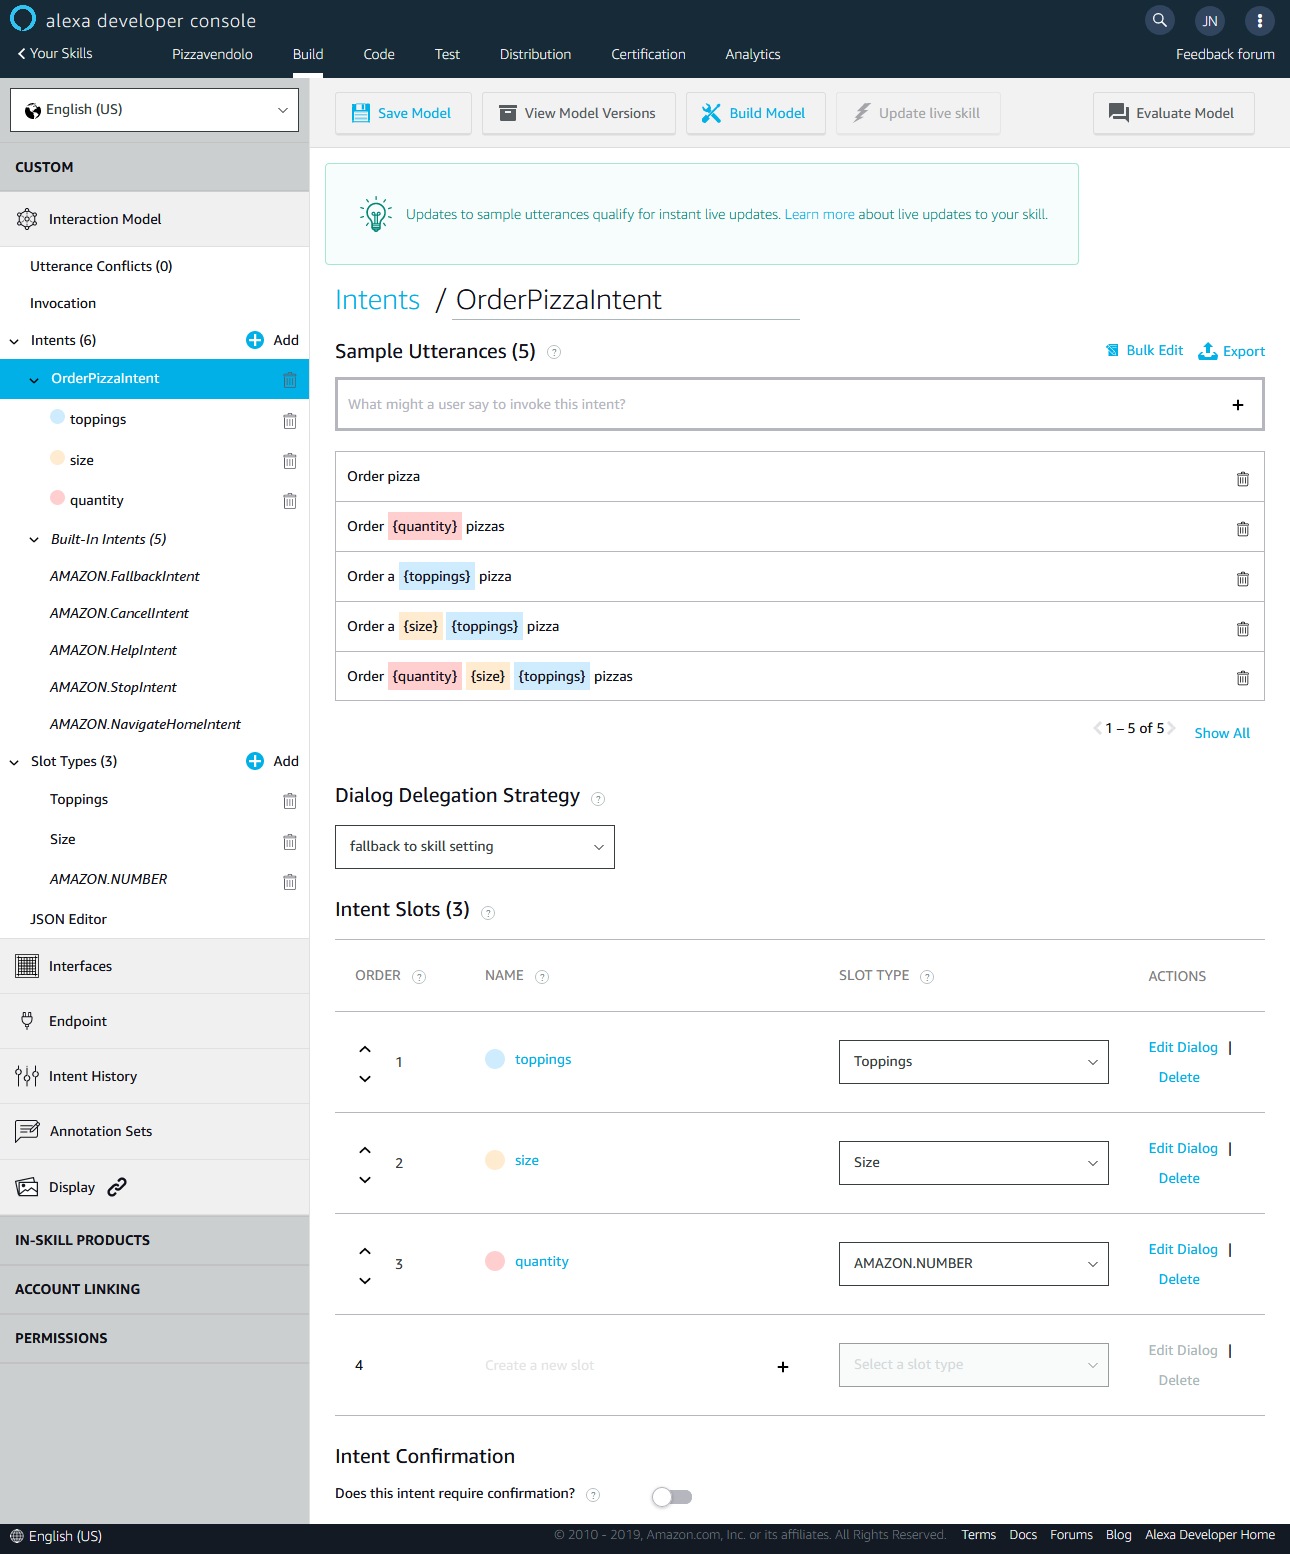
Finally click "Save Model" and "Build Model" to compile the model. We can then use the "Evaluate Model" button to test some phrases and see that Alexa evaluates the correct intent and populates the slot.
Excellent - we are now well on our way to some delicious pizza! 😃
Creating the Function
Now we have our model set up we need to create a backend for it. You can opt to use the Alexa-hosted function right at the beginning of setting up the skill. This will allow you to edit the code directly in the Alexa developer console from the "Code" tab. But we are going to write our backend as an Azure Function using .NET!
The first thing you are going to need is the excellent Alexa Skill Project Template. Once you have installed that, let's fire up Visual Studio and get to work.
Create a new project using the "Alexa Skill" template
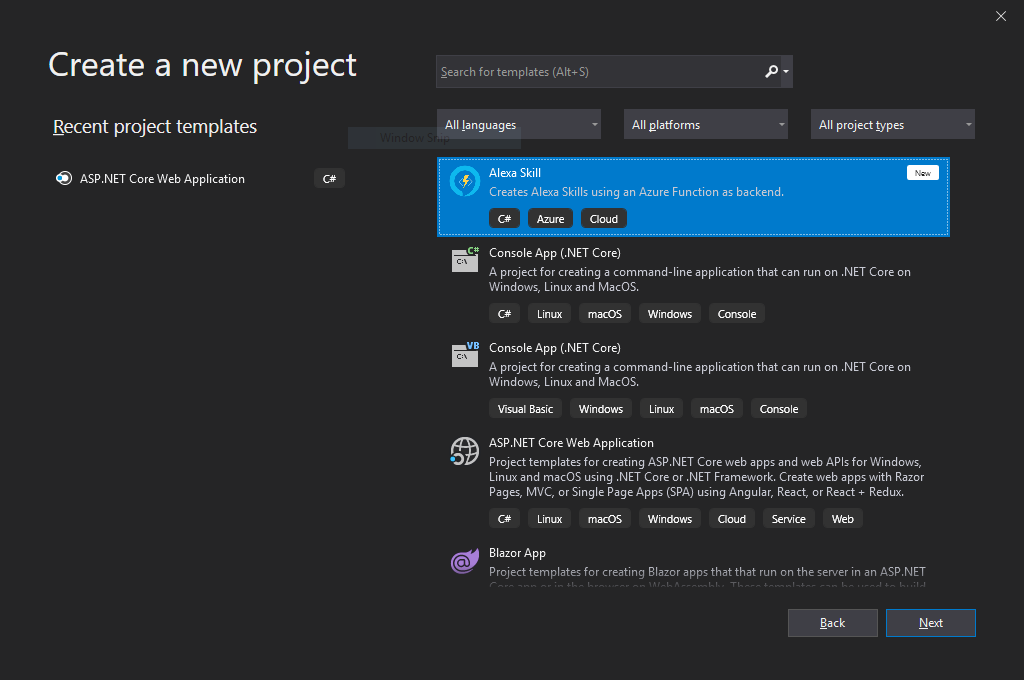
This will create a new project with everything needed by the skill's backend. It uses the Alexa Skills SDK for .NET.

The implemetation is in Skill.cs and already includes support for handling the built-in intents as well as languages and validating the requests.
This function takes the json request provided by Alexa, deserialises it into a SkillRequest object and then allows us to parse it's contents to determine what to say back in response. We will examine the request sent to us once we wire up our function.
First we will change the welcome message. When the skill is first instatiated by Alexa, a LaunchRequest is sent to our function. This is handled by this code:
if (request is LaunchRequest launchRequest)
    {
        log.LogInformation("Session started");

        var welcomeMessage = await locale.Get(LanguageKeys.Welcome, null);
        var welcomeRepromptMessage = await locale.Get(LanguageKeys.WelcomeReprompt, null);
        response = ResponseBuilder.Ask(welcomeMessage, RepromptBuilder.Create(welcomeRepromptMessage));
    }
}
You will note that this returns a message as well as a reprompt message. When you get Alexa to ask a question, you can set a reprompt to be said if she does not get a response. This is using the template's prebuilt localisation, so we can change the default strings at the bottom of the class. So we will simply change the line in the SetupLanguageResources method
[LanguageKeys.Welcome] = "Welcome to Pizza Vendolo! What would you like to order?",
Next we see the handler for further requests. There are many different request types that can be sent to the function depending on your model, such as requesting to start playing audio, or when someone touches a control on the screen. For now we are just going to stick to the basics and handle IntentRequests.
else if (request is IntentRequest intentRequest)
After this line you will see the handlers for the built-in intents - cancel, help, stop etc. Then we can add our code to deal with our new OrderPizzaIntent we set up in the model.
So after the following comment we will add a handler for this which will perform our action and report back. Our toppings, size and quantity slot values can be retrieved from the intent.
Bear in mind as this is a very simple example!
For now we are going to simply parse the request and say it back to the user:
// Processes request according to intentRequest.Intent.Name...

// Handle OrderPizzaIntent
if (intentRequest.Intent.Name == "OrderPizzaIntent")
{
   intentRequest.Intent.Slots.TryGetValue("toppings", out var toppingsSlot);
   intentRequest.Intent.Slots.TryGetValue("quantity", out var quantitySlot);
   intentRequest.Intent.Slots.TryGetValue("size", out var sizeSlot);

   int quantity = quantitySlot == null ? 1 : Convert.ToInt32(quantitySlot.Value);

   intentRequest.Intent.Slots.TryGetValue("die_type", out var dieTypeSlot);

   var message = new PlainTextOutputSpeech { Text = $"You ordered {quantity} {sizeSlot?.Value} {toppingsSlot?.Value} pizzas!" };
   response = ResponseBuilder.Tell(message);
}
After this, we publish our function to Azure. If you are unsure how to do this, follow the steps on Microsoft Docs here.
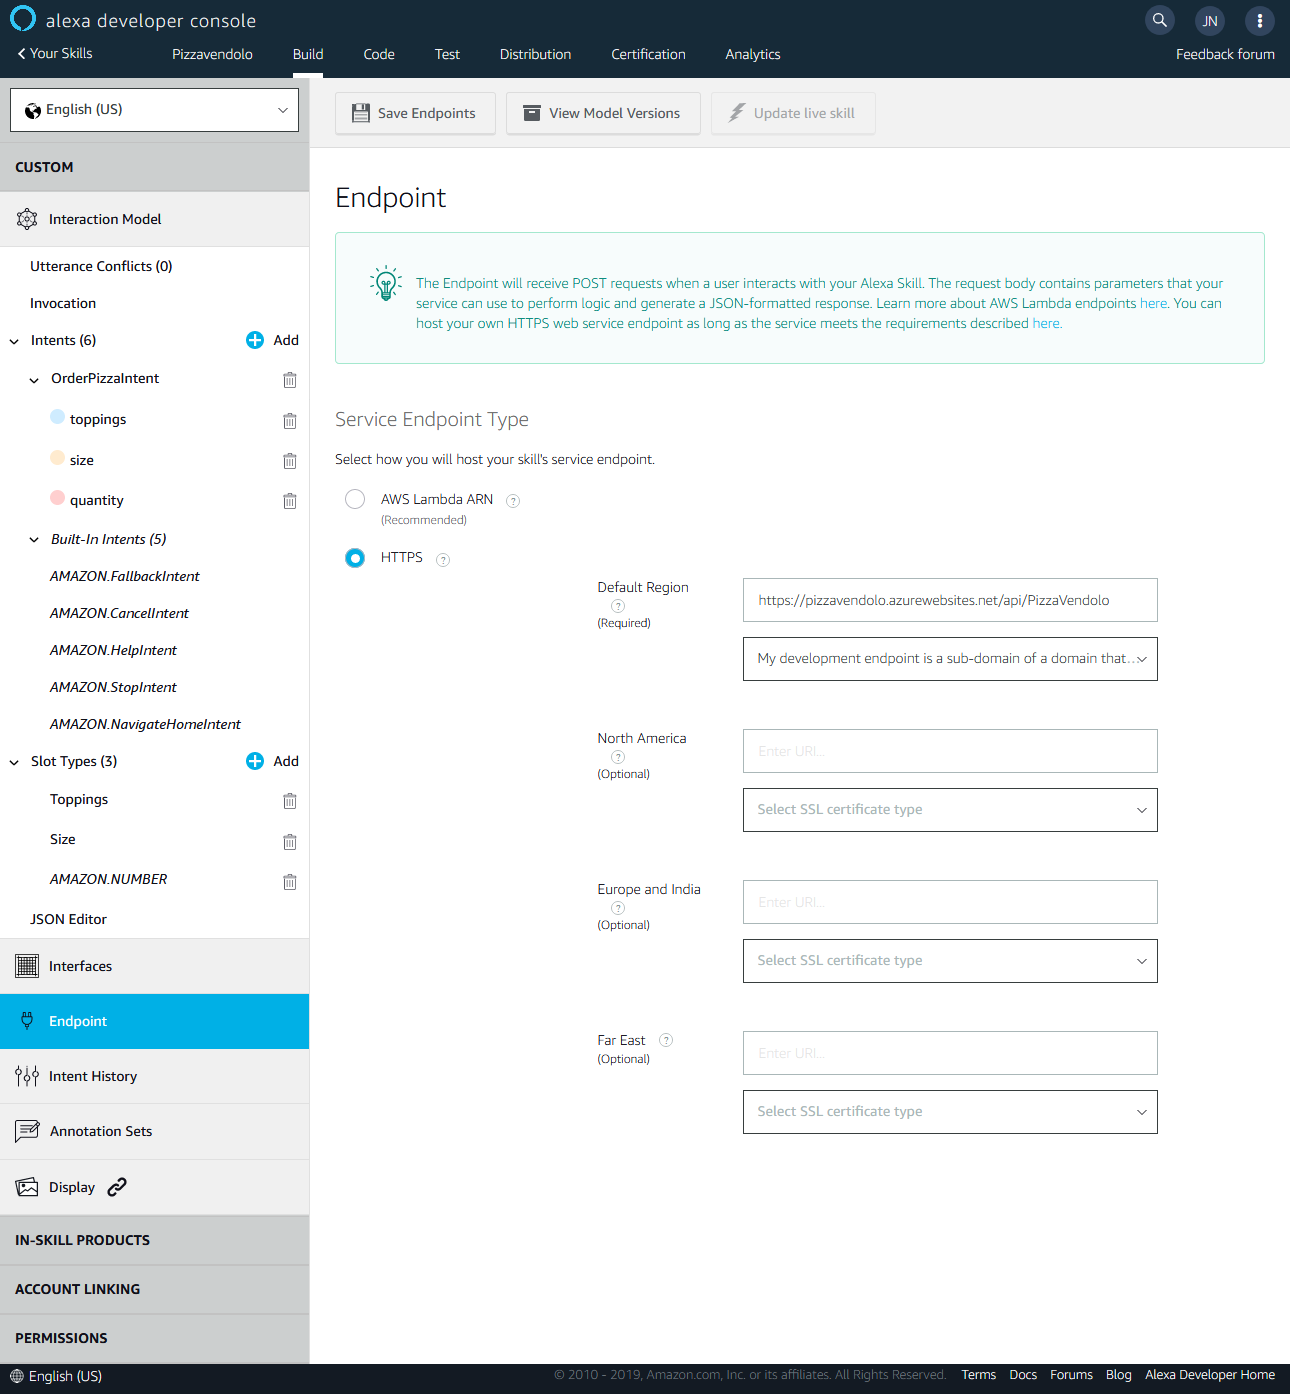
Once we have published our function, we simply need the url to our endpoint which in our case is https://pizzavendolo.azurewebsites.net/api/PizzaVendolo
Connecting and Testing
Now it's time to head back to the Alexa Developer Console and select "Endpoint" from the menu. We enter our URL into the box and select the "My development endpoint is a sub-domain of a domain that has a wildcard certificate from a certificate authority" option
To test our Skill, we can use the "Test" tab from the top bar. This is the emulator that allows us to speak or write commands to Alexa and see the request. You can also test your skill using a real device as long as it is registered to the account you use for developing!
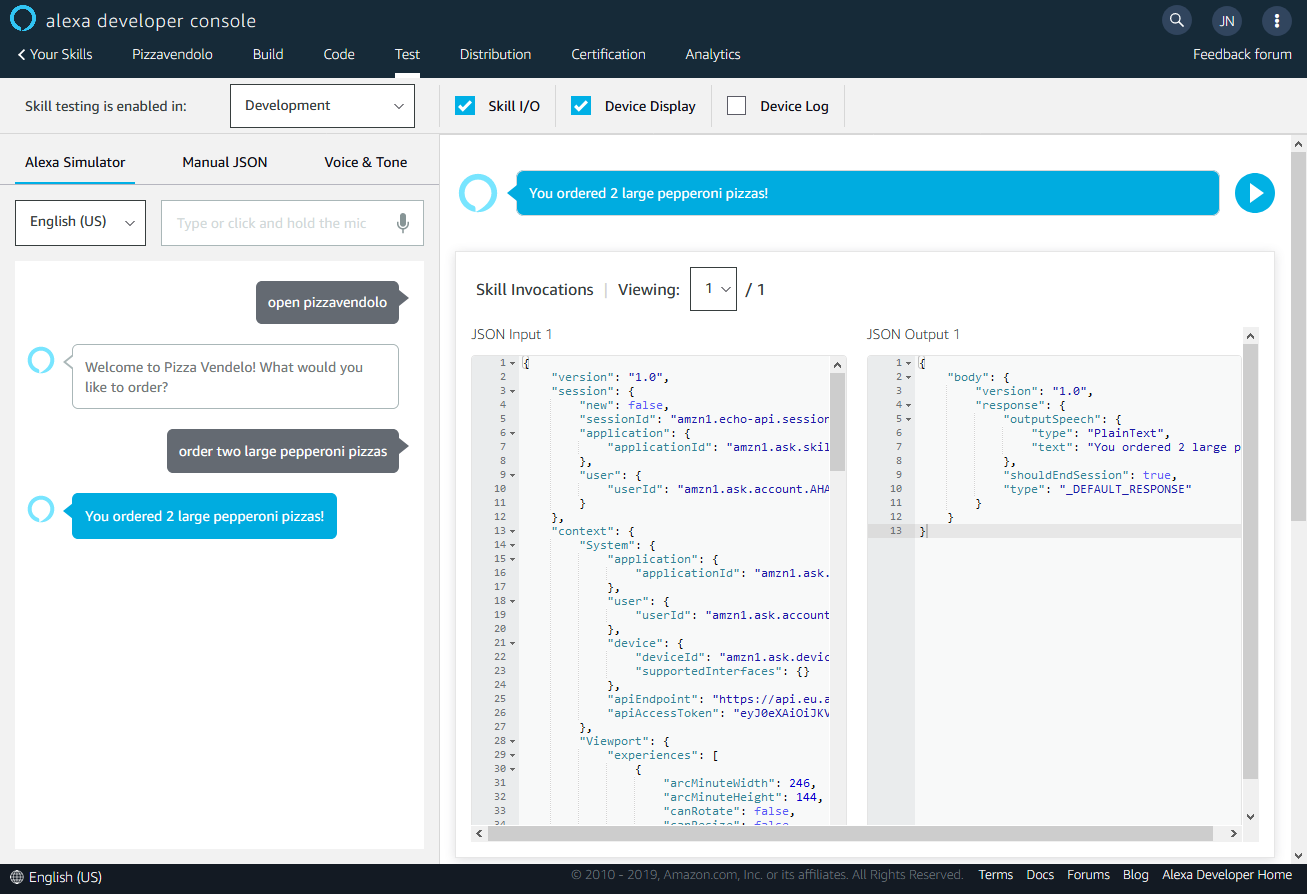
Success! We have set up our skill and connected it to a function 🍕🎉
Soon I will write a part 2 where we will build out our skill a little more. Hopefully see you there!
In the meantime, get in touch with me on Twitter: @euronay!