
I recently discovered Github Actions as an amazingly simple way to set up continuous integration for my .NET Core web apps.
A long time ago, I wrote about how I host my webapps on a small Linux VPS. To deploy a new version I have to build my web app, copy the files over onto my server and then restart my systemd service that starts the dotnet runtime and runs the application.
With Github Actions, this whole process can be automated by adding a single file to your repository. Each Action consists of a workflow definition file that is placed in the .github/workflows/ folder. The workflow is composed of a number of actions that either run a script directly or execute a Docker container.
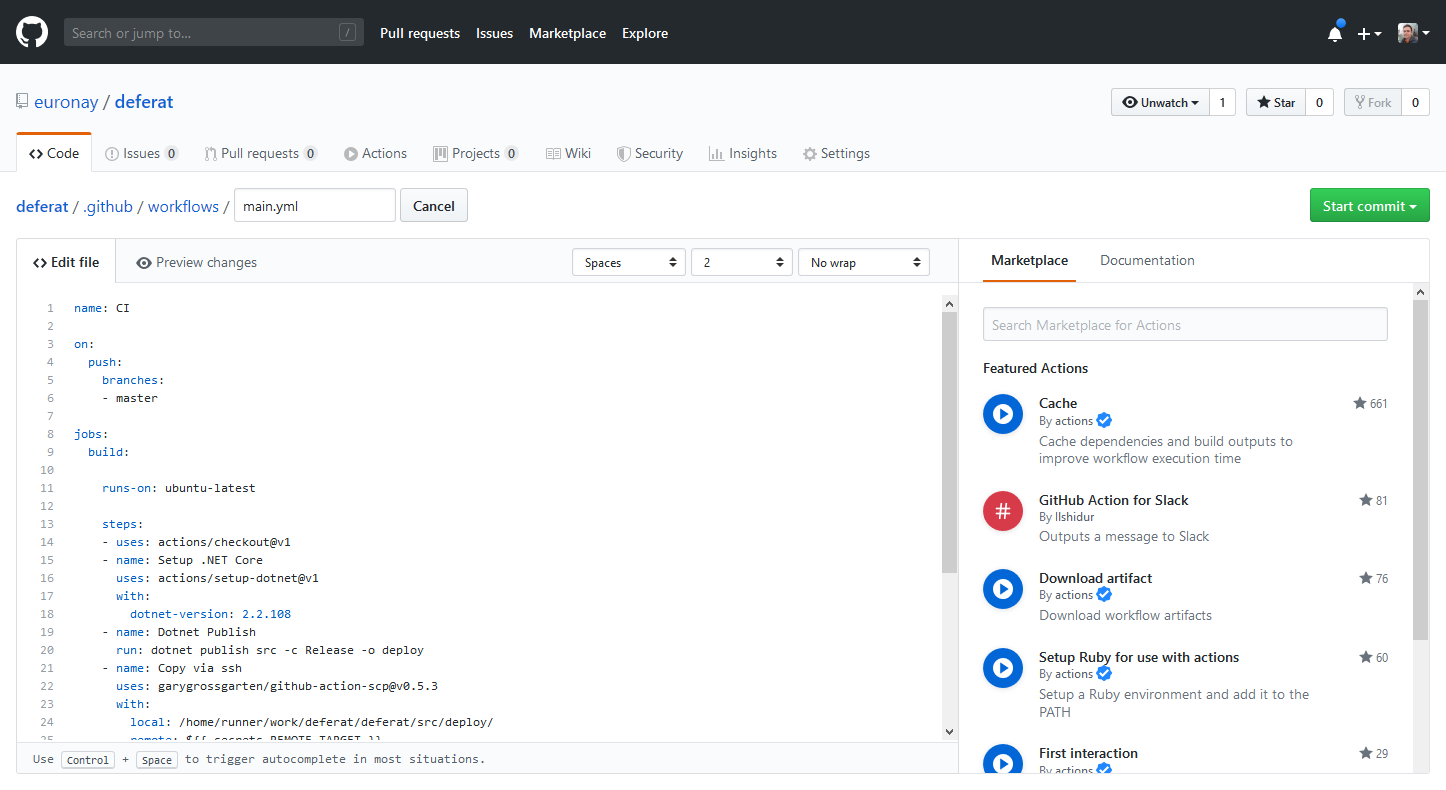
You can add a workflow directly in Github if you go to the Actions tab of your repository. From here you can choose a number of starter workflows for various development tools or create a new workflow from scratch. The great thing is the editor which allows you to quickly look up all of the different actions that you can use in your workflow from the marketplace on the left hand side.
The workflow file looks like this:
name: CI

on: [push]

jobs:
  build:

    runs-on: ubuntu-latest

    steps:
    - uses: actions/checkout@v1
    - name: Run a one-line script
      run: echo Hello, world!
    - name: Run a multi-line script
      run: |
        echo Add other actions to build,
        echo test, and deploy your project.
The file defines when the action is triggered and what steps are run.
My build workflow
I am publishing a .NET Core MVC app, so I need to run the following when a commit is made to my master branch:
- Checkout my repository
- Run
dotnet publishto build my application - Copy the files to my server
- Restart the service on my server
So first we set up the script to run when a commit is made. but we want to limit it to just the master branch:
on:
  push:
    branches:
    - master
Next in the jobs section we are going to add our job and define what virtual machine OS will be used to run it. Github provides runners for Linux, Windows and macOS. Seeing as I am a Linux guy, I'm going to use that:
jobs:
  build:

    runs-on: ubuntu-latest
Next we add each step we need to do to deploy our application as listed above. This is set up in the steps section. First we checkout the repository:
steps:
    - uses: actions/checkout@v1
Then we need to setup .NET Core and build our application. Pay attention to the version of .NET you need - this must match your application:
    - name: Setup .NET Core
      uses: actions/setup-dotnet@v1
      with:
        dotnet-version: 2.2.108
    - name: Dotnet Publish
      run: dotnet publish src -c Release -o deploy
This has build and published our files to a /deploy directory on the virtual machine. Next is the good bit! We use a couple of great third-party commands from the market to copy the files using SCP to the server.
- name: Copy via ssh
      uses: garygrossgarten/github-action-scp@v0.5.3
      with:
        local: /home/runner/work/deferat/deferat/src/deploy/
        remote: ${{ secrets.REMOTE_TARGET }}
        host: ${{ secrets.REMOTE_HOST }}
        username: ${{ secrets.REMOTE_USER }}
        privateKey: ${{ secrets.REMOTE_SSH_KEY }}
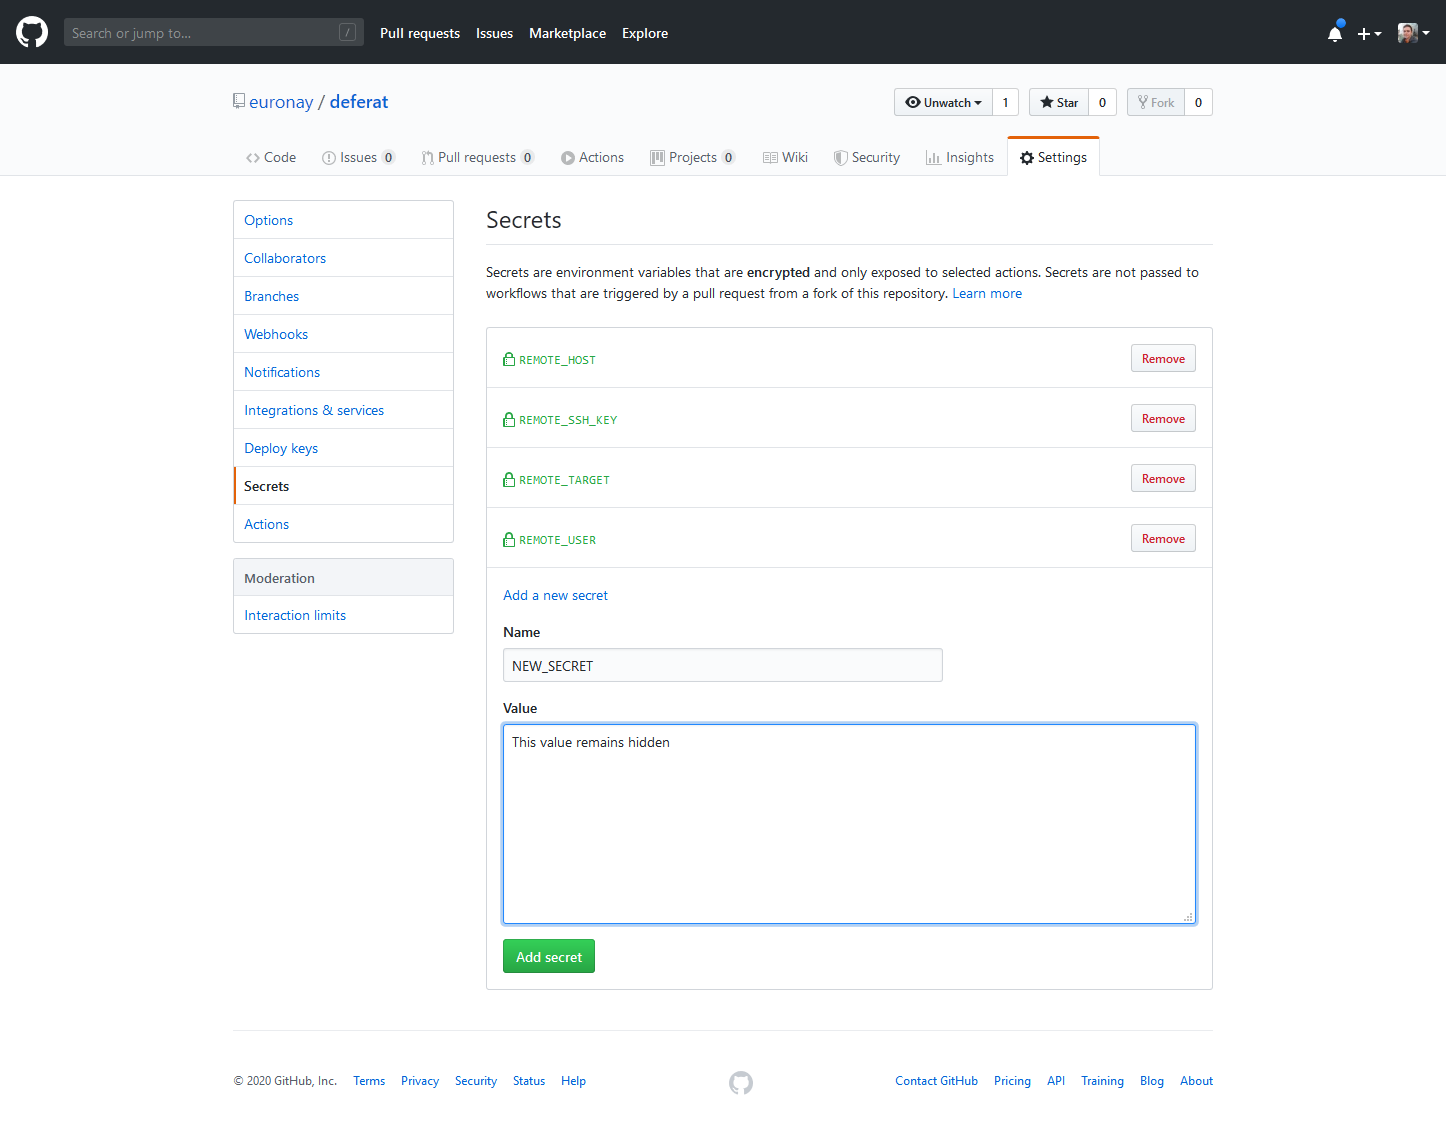
It's very important that we don't commit passwords in code to our repository (including our workflow definition - it is code after all!) as they can then be read by anyone! So we use the Secrets tab in the Settings tab of the repository. Any variables added here will be available in the script int he format ${{ secrets.SECRET_NAME }}:
Finally I'm going to run a command over SSH to restart the service I have on my server. The command to run is service deferat start, so we do this like this:
- name: Run SSH command
      uses: garygrossgarten/github-action-ssh@v0.3.0
      with:
        command: sudo service deferat start
        host: ${{ secrets.REMOTE_HOST }}
        username: ${{ secrets.REMOTE_USER }}
        privateKey: ${{ secrets.REMOTE_SSH_KEY }}
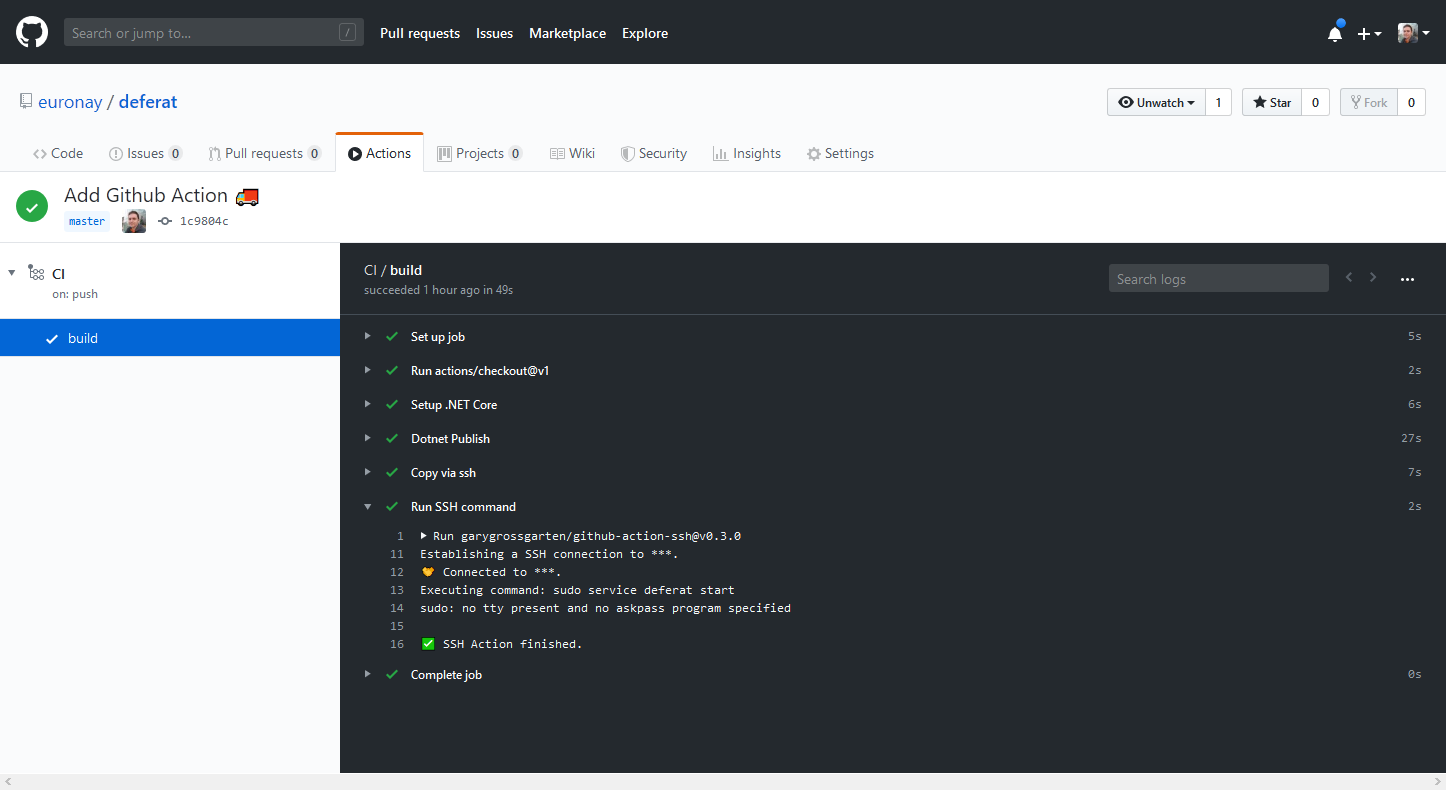
The workflow is now complete! Once the file is committed (straight onto the master branch of course 😄), this will trigger the action. Now when you go to the Actions tab, you can see a log every time the workflow has been run and you can see a detailed log of each step. Each step can be expanded to see more information.
The final main.yml file looks like this:
name: CI

on:
  push:
    branches:
    - master

jobs:
  build:

    runs-on: ubuntu-latest

    steps:
    - uses: actions/checkout@v1
    - name: Setup .NET Core
      uses: actions/setup-dotnet@v1
      with:
        dotnet-version: 2.2.108
    - name: Dotnet Publish
      run: dotnet publish src -c Release -o deploy
    - name: Copy via ssh
      uses: garygrossgarten/github-action-scp@v0.5.3
      with:
        local: /home/runner/work/deferat/deferat/src/deploy/
        remote: ${{ secrets.REMOTE_TARGET }}
        host: ${{ secrets.REMOTE_HOST }}
        username: ${{ secrets.REMOTE_USER }}
        privateKey: ${{ secrets.REMOTE_SSH_KEY }}
    - name: Run SSH command
      uses: garygrossgarten/github-action-ssh@v0.3.0
      with:
        command: sudo service deferat start
        host: ${{ secrets.REMOTE_HOST }}
        username: ${{ secrets.REMOTE_USER }}
        privateKey: ${{ secrets.REMOTE_SSH_KEY }}
And there it is! A simple file and you have your application building and deploying directly to a server 🎉
See it in action at my blog repository here: https://github.com/euronay/deferat